Sensative Strips Payload Configuration Part 1: Customization via App
Last modified on 11th April, 2024
Like me, you are using one of the Sensative Strips sensors for LoRaWAN and are wondering how you can adjust its payload ? Then read on now and in this small 2-part series of articles I will show you which two options you have here using my LoRaWAN-based strip Multi-Sensor +Drip as an example.
A short outlook first: If you want to learn more about the different Strips sensors from Sensative in general and their differences, then look forward to a blog post about it that will follow soon.
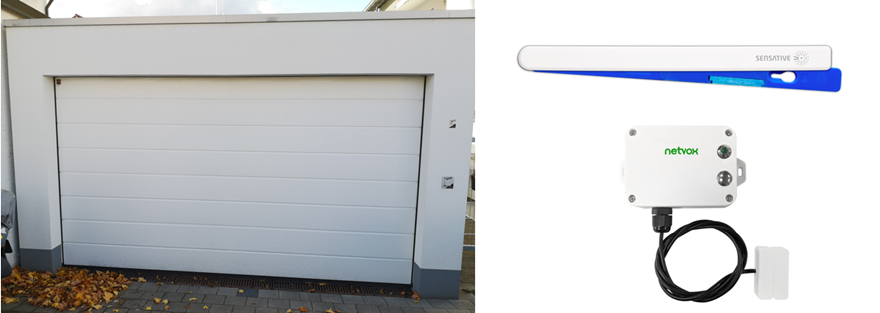
But back to the actual topic. Basically, all Strips sensors from Sensative are delivered in such a way that you can use them directly after the initial integration into your LoRaWAN network and in your application system (such as the ZENNER Datahub and the B.One Gallery). With my +Drip, the integrated magnetic sensor and the “Tamper Alert” were activated as standard. This allows the opening status of doors, gates or windows to be monitored and an alarm to be triggered if more than just the magnet installed on the door or window is detected when it is closed. However, this standard configuration of the payload, i.e. the message content sent by the sensor, does not always match the requirements of your use case. In this case you have two options: Option 1 is payload adjustment via the “Strips Configuration Application” provided by Sensative, option 2 is manual payload adjustment. The latter is always necessary if there is no suitable predefined profile in the configuration app to implement your use case. In this article, I will first show you how the adjustment via the app works, for which you do not need any “technical” knowledge. No matter whether you want to configure the Strips Multi-Sensor +Drip, +Guard, +Comfort or the Strips Presence, simply call up the web-based Configuration App and go through the following four steps:
Step 1: Selection of Sensor Model & suitable Profile
The first thing you have to do in the configuration app is select the right sensor model and a profile that comes closest to your requirements. Depending on the model, other profiles are available to you and thus different reports that can be combined with each other. In turn, a report contains the actual values that the sensor transmits in a data packet. In addition to various predefined profiles with standard values already stored, you can alternatively create a so-called “custom profile” in which you define all the values yourself. For my own use case (more on that later) with the Multi-Sensor +Drip, I chose the “Water Leak Alarm” profile. This allows an alarm to be triggered in the event of a leak, thus avoiding major water damage.

Step 2: Select or add Reports
After choosing the profile that suits you, you can define which reports you would like to receive later when the sensor sends data. These can also optionally be combined into so-called report groups (RG1, RG2, RG3). This allows you to combine selected reports into a single Uplink payload package. This means that if any activated report of a report group is triggered, every other report assigned to this group is also included in the uplink sent by the sensor. A total of up to three report groups (RGs) can be created. When does that make sense? if e.g. B. certain notifications are only intended for certain groups of recipients or there are values that are required with different frequency. If you do not create such a group, only the value that has changed will be transmitted each time the device is sent. Tip at this point: The Battery Report is not supplied by default. To do this, you must first create a report group and then assign the battery report to it. In this case, I created a report group with the following reports enabled:
- “Flood Alert” to get me a notification in case of a leak
- “Flood Report” to regularly receive the current leakage status in the stored interval
- “Battery Report” to always get the current battery status


Step 3: Change or add Settings/Preferences
After selecting the reports, you can now select the standard values stored for each , e.g. adjust regarding the measurement interval . To do this, simply select one of the categories and the metric to be adjusted and then enter the desired value. A simple example: Category “Leakage” + setting “Flood Poll Interval”. This can be used to define the time interval at which the sensor measures the moisture in order to detect a leak. Since I find every 30 seconds to be sufficient for my case, I have not changed anything in the default setting of the poll interval. Caution: In the “Flood Report Interval”, on the other hand, the default value is 0 seconds. However, if this value remains at 0, the report will not be sent. That’s why I set the value to 3,600 in my case, so that every 60 min. the current leakage status is transmitted, even if the flood alarm is not triggered.


Also important to know: Changing the default values stored in the profiles can have a major impact on battery life. With the help of the Battery Calculator from Sensative, the expected battery life depending on the transmission interval and “spreading factor” can be roughly predicted, but it’s best to always have a look at it.
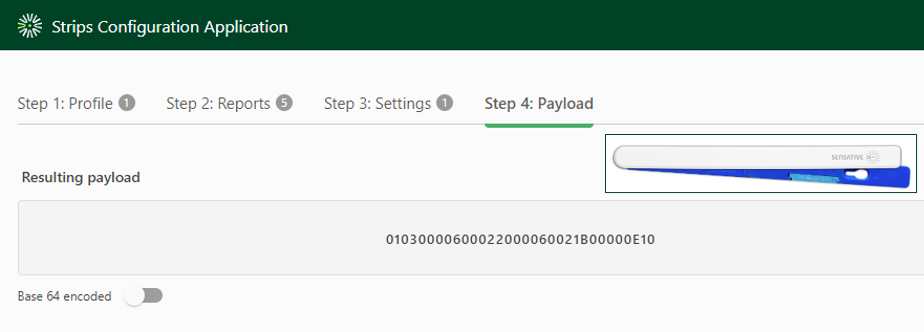
Step 4: Send Payload to Sensor as Downlink
After you have made all the selections and settings, the app generates the payload to be stored in the sensor. You can now either download this as a TXT file or simply copy it to the clipboard to send it as a downlink to your sensor via your server application. If required, you can also display the payload in Base64 coding. Important to know at this point: Since the Strips sensors are type A devices, a so-called “open frame” must be sent to receive the downlink. To do this, you simply have to hold the supplied magnet 3x on the side with the rounded corners. You can tell whether it worked by the fact that the LED then flashes 3x.

So now you know how to easily configure your Strips sensors individually. In the second part of this small series of articles, you will find out how you can further adjust this configuration manually if there are no 100% suitable profiles for your application in the Strips Configuration App.
Recommend0 recommendationsPublished in Operating Aids, Sensors


Responses