Like me, you already use the B.One Galleryvisualization platform in combination with a compatible GPS tracker and would like to receive a notification if your monitored assets, pets or personal valuables move too far away? Then read on here and I’ll show you how easy it is to set up such geofencing in the B.One Gallery.
Which GPS-based sensors does the B.One Gallery support?
As far as I know, the two GPS trackers Digital Matter Oyster and Digital Matter Yabby can be visualized in the B.One Gallery in addition to the Object Locator tab. Simply select the right device for you when you set up your sensors. In addition, the same notification types are available for all GPS trackers in the B.One Gallery and setting up geofencing works exactly as described below using the example of the Object Locator tab.
Set up Gofencing using Tabs Object Locator as an Example
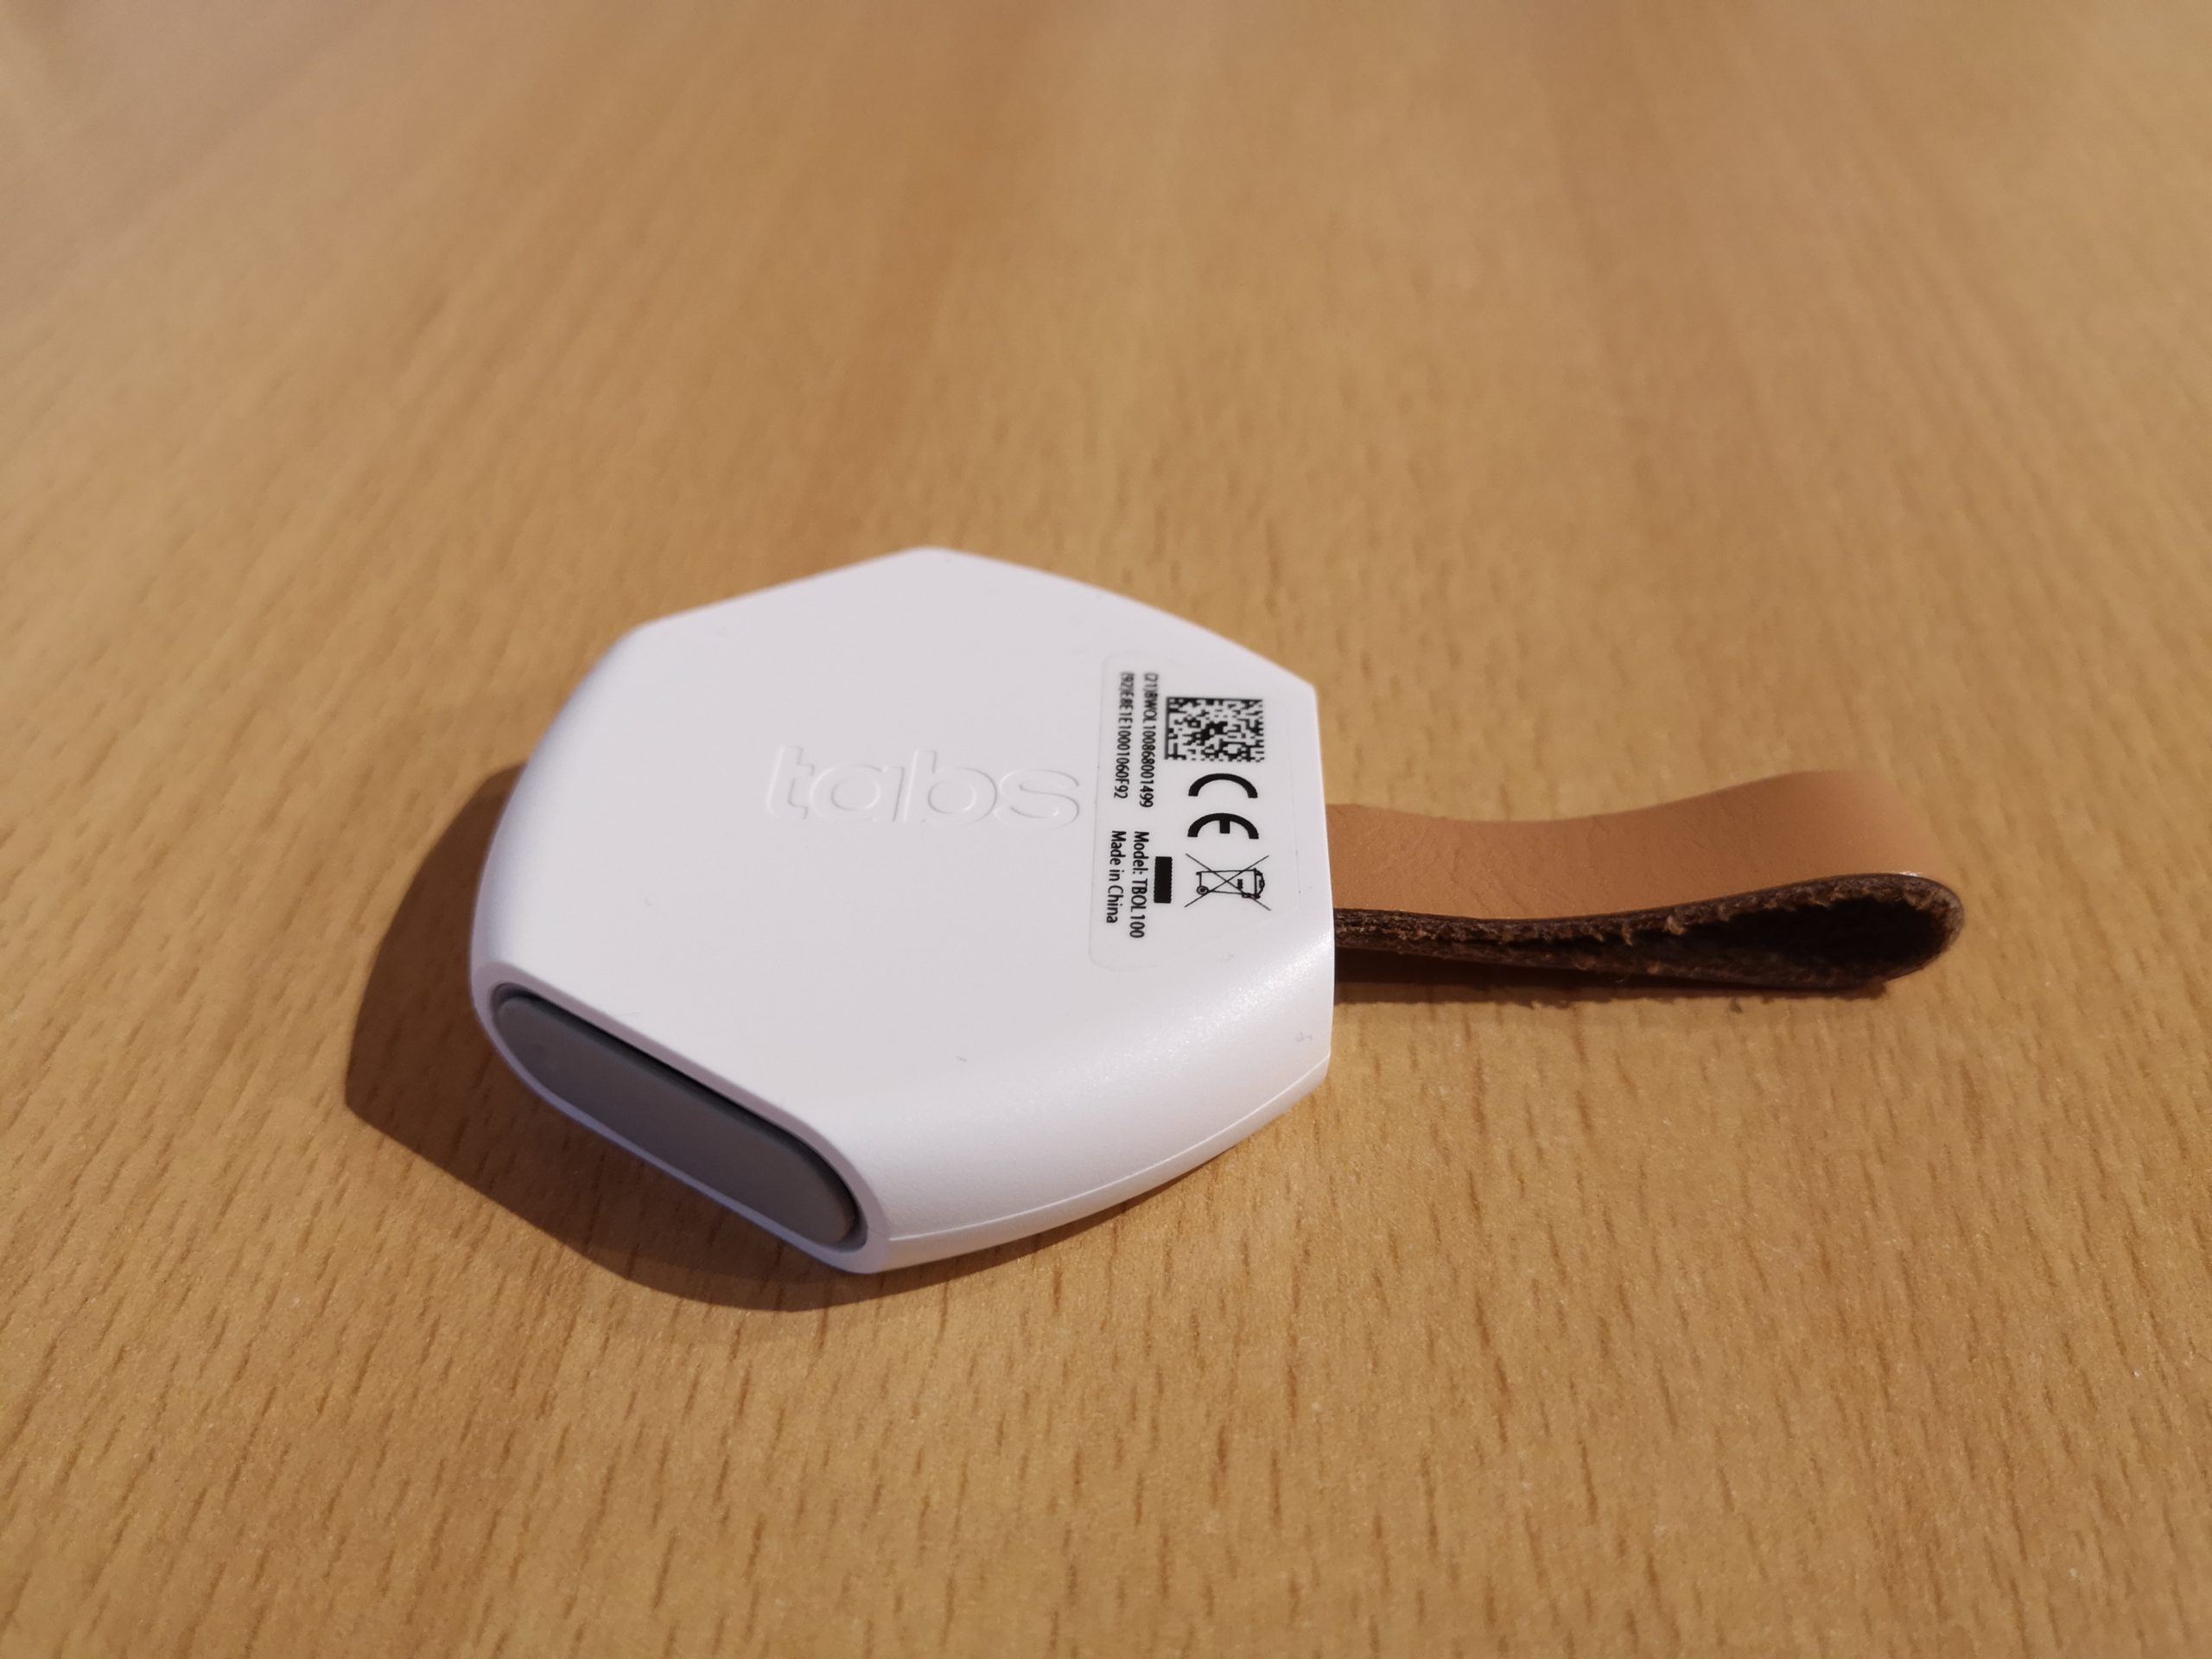
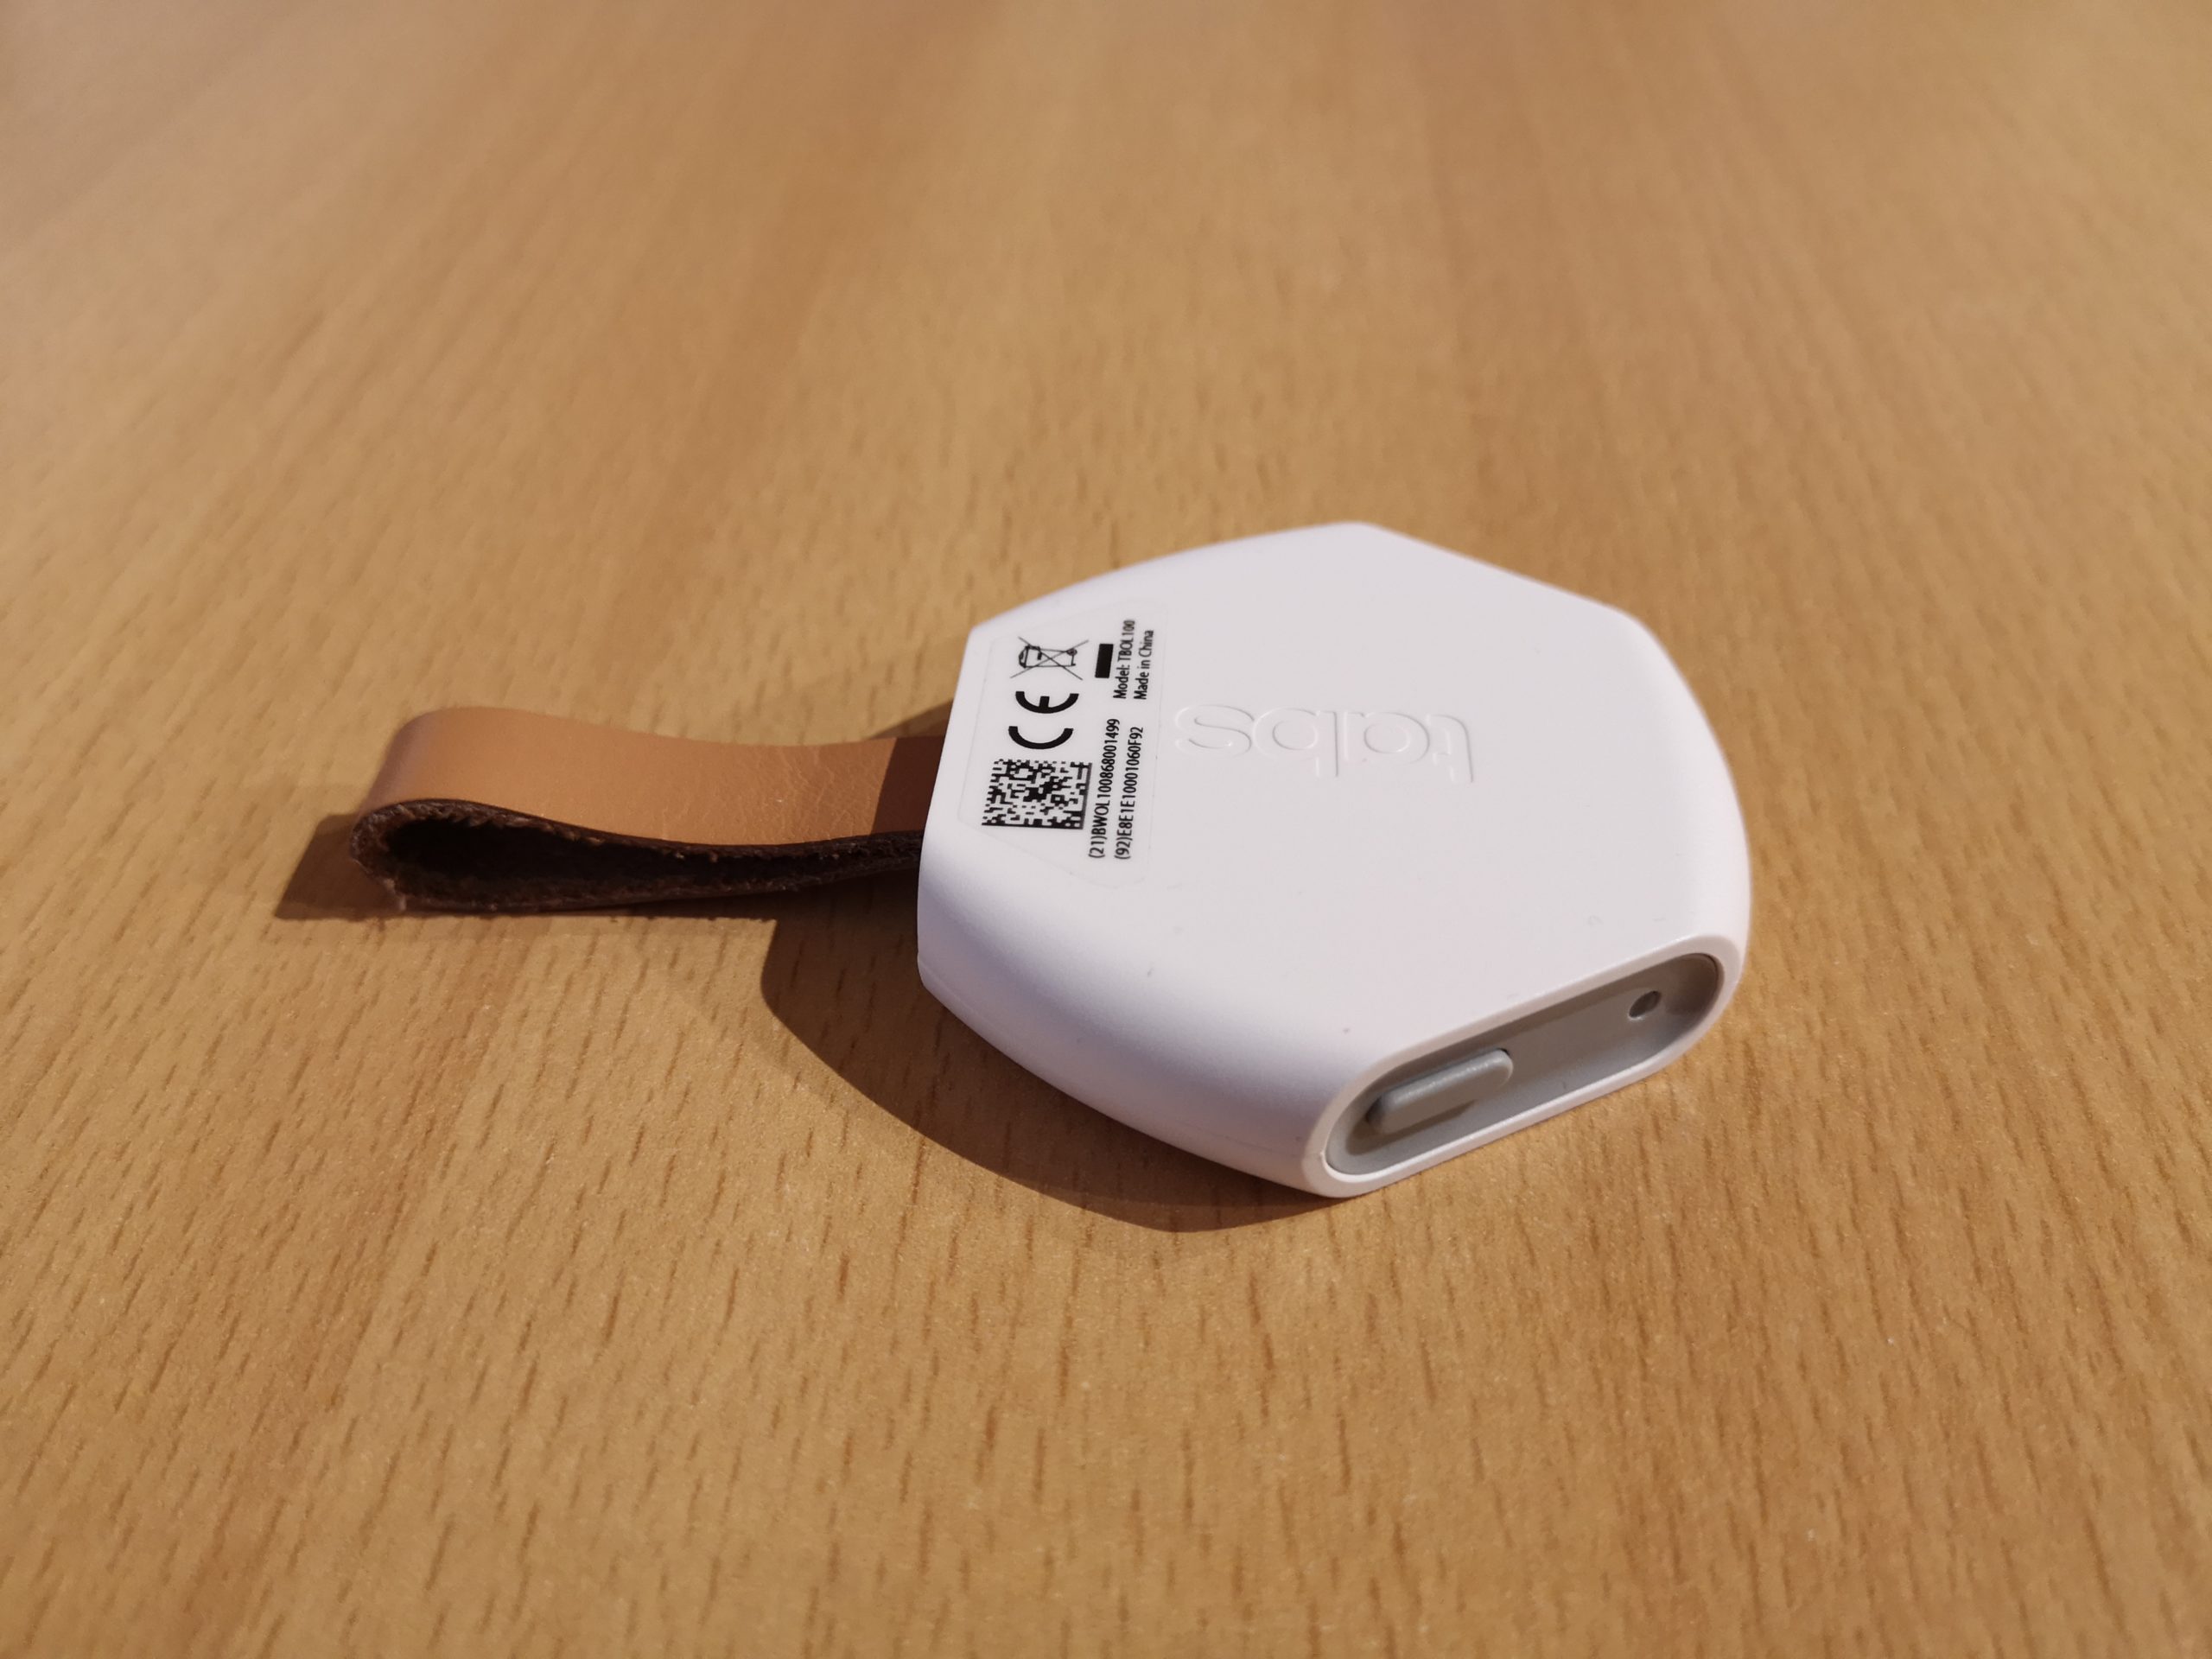
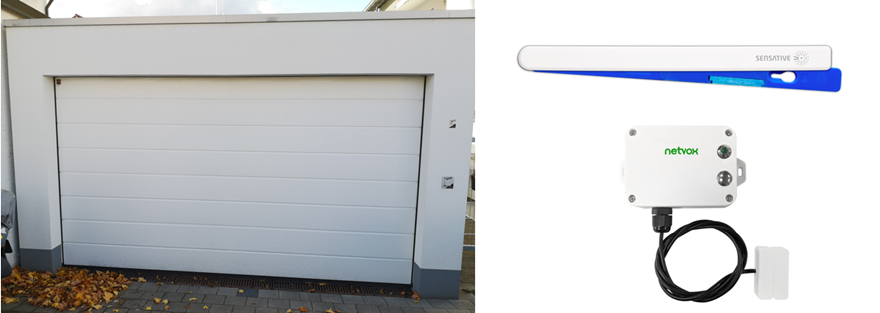
In this case, I once set up geofencing for my LoRaWAN and GPS -based Tabs Object Locator from Browan Communications. This is a versatile and compact GPS tracker that can be used to track everything from assets to personal belongings to your pets. The core components of the tracker are a GNSS receiver and a three-axis accelerometer for GPS-based position determination and for recording movements, a push button, an LED display and a USB port for charging the integrated LiPo battery.
In order not to go beyond the scope of this article, I assume that the sensor was previously added to your B.One Gallery and that the first data packets also arrived there. Otherwise, I recommend the blog post “B.One Gallery Howto: Add sensors” by Boris, in which the adding of new sensors is described step by step.
To set up a simple geofencing, you simply have to go through the following three steps in the B.One Gallery:
Step 1:Navigate to the Notifications Section
Setting up geofencing in B.One Gallery Step 1: Open the Notifications tab
Step 2:Add Notification
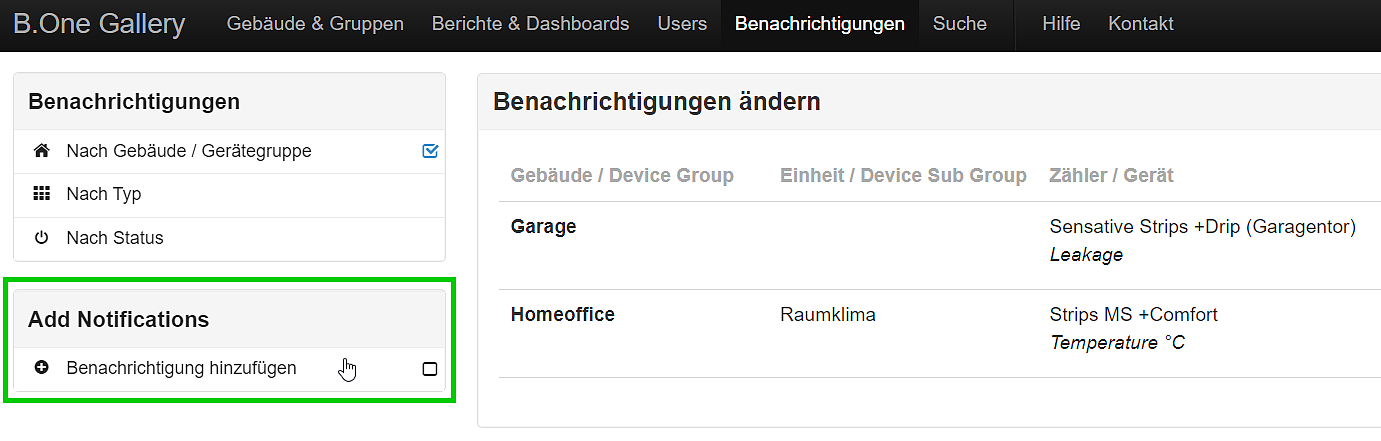
If you haven’t yet created notifications for your sensors, you can simply skip this step and go straight to step 3, the actual notification configuration. Otherwise you have to click once on the left on “Add notification” to create a new notification.
Set up geofencing in B.One Gallery Step 2: Add a new notification
Step 3:Configure new Notification
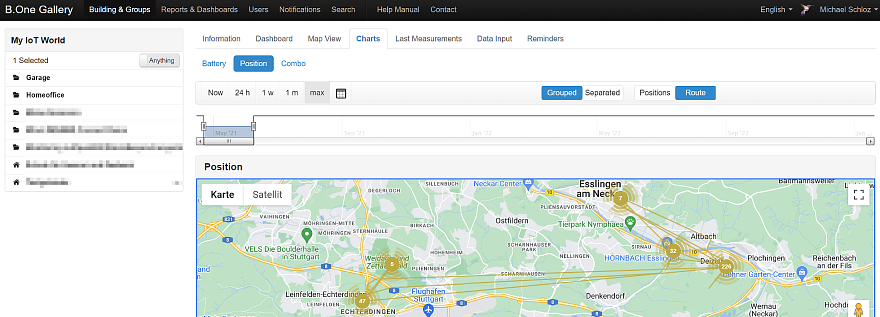
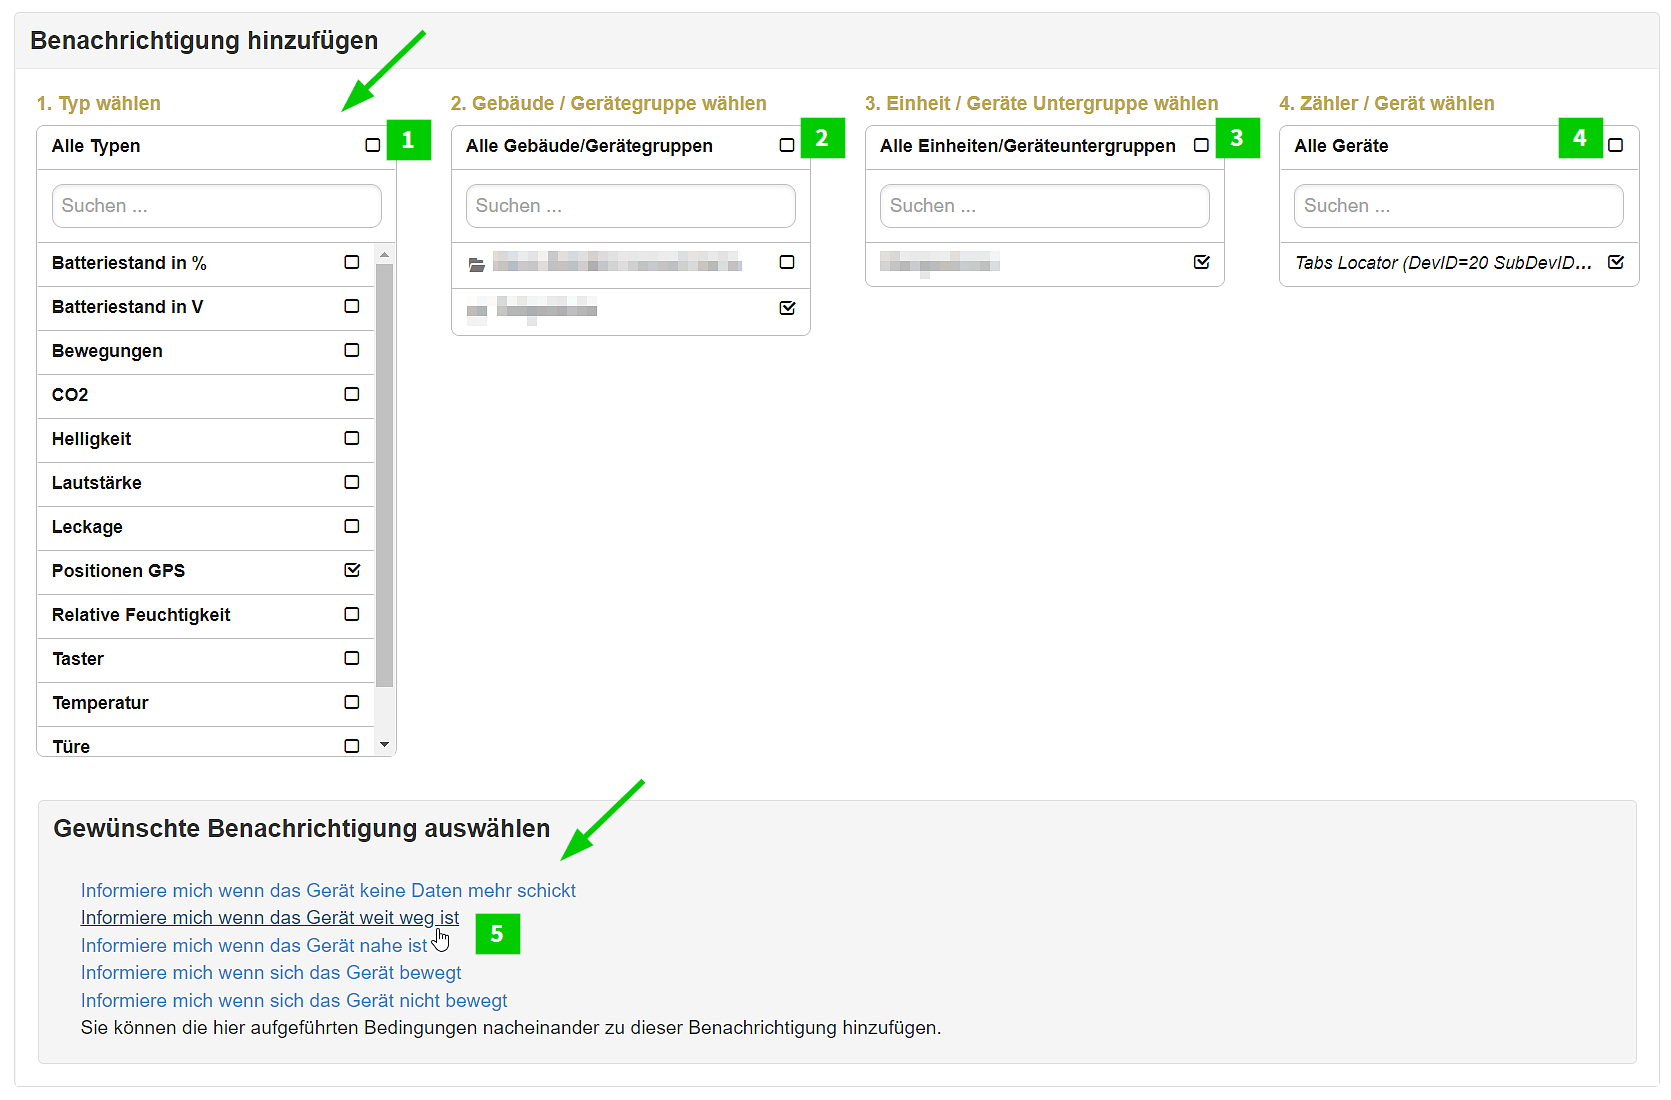
Set up geofencing in B.One Gallery Step 3: Configure notification (device selection)
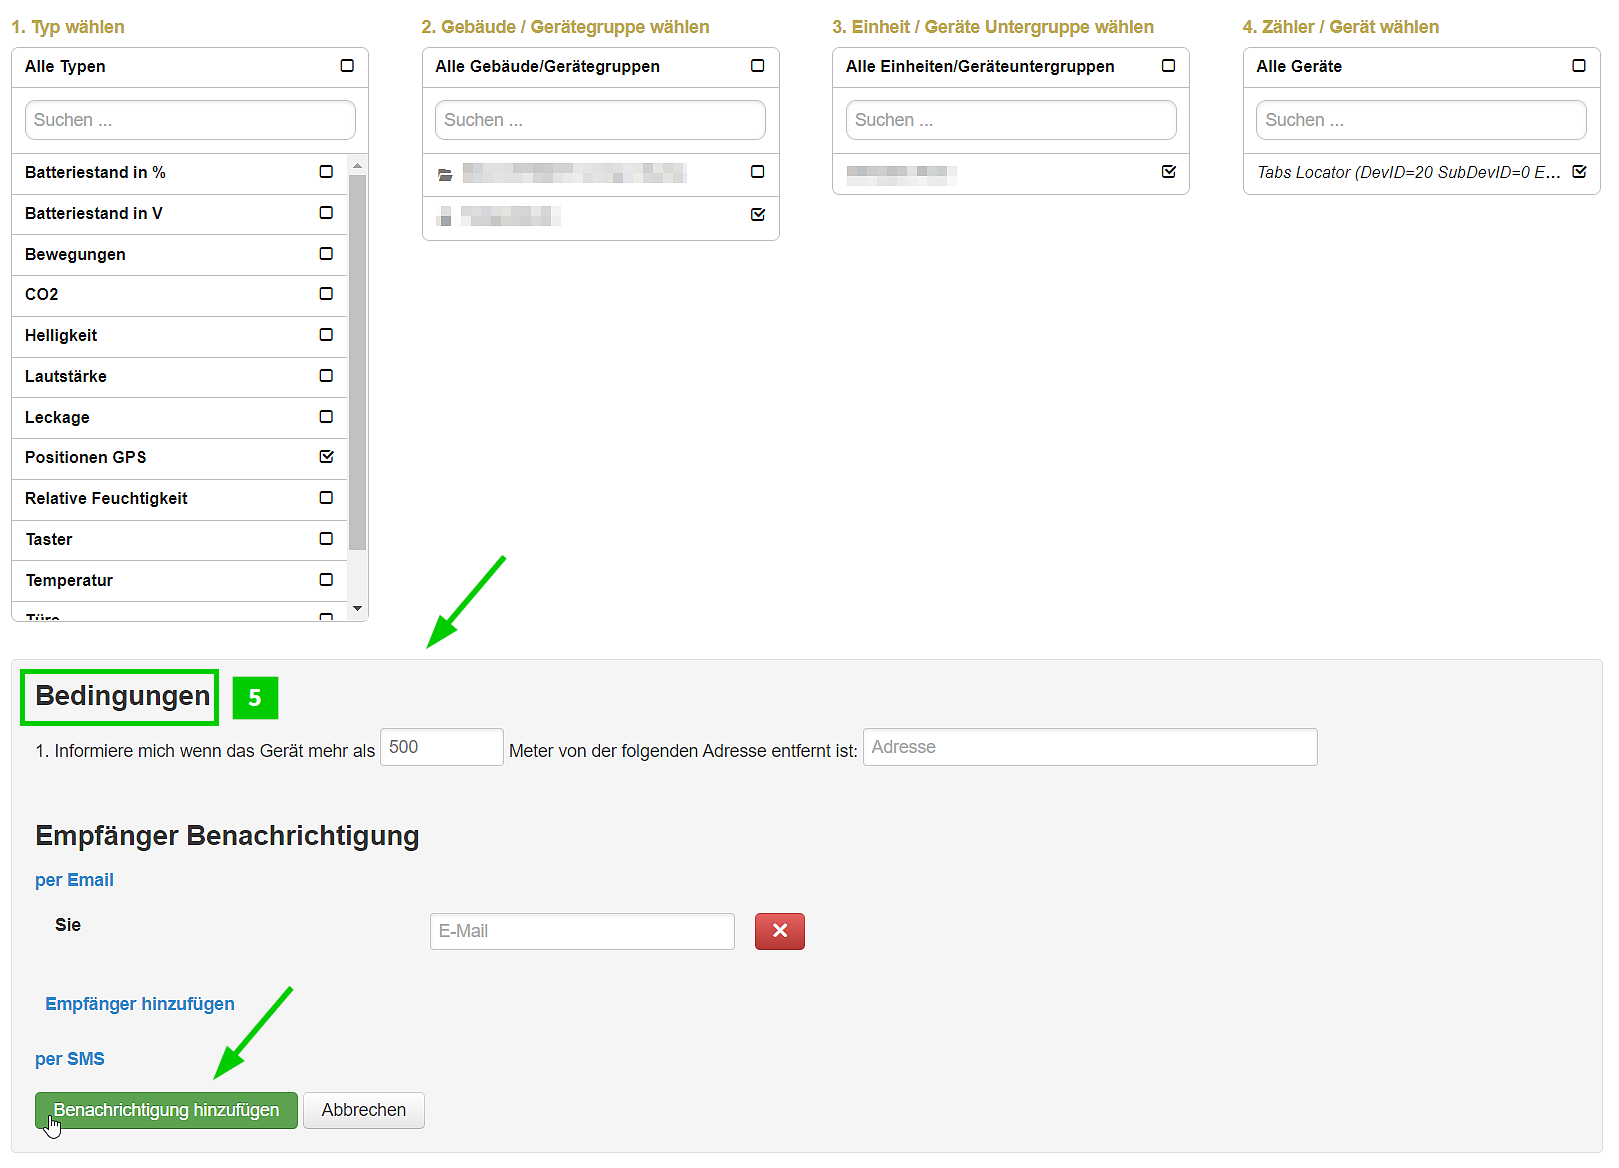
Set up geofencing in B.One Gallery Step 3: Configure notification (conditions)
Select notification type, in our case “Position GPS”. All building groups that contain sensors of this type are now displayed to the right.
Select Building / Device group
(Optional) Select Unit / Device Sub Group to filter only for sensors of certain sub groups if you have created such
Select meters/devices, in this case the Tabs Object Locator.
Select desired notification(s) and configure conditions and recipients. In order to set up a simple geofencing as in this example, you select the notification “Inform me if the device is far away” and enter the desired distance from your address, which the tracked object should not exceed unnoticed. You can also be notified when the object is in the desired area again. A little tip: if you cannot see the notifications shown in the screenshot above in this step, the reason for this is very likely that the sensor has not yet sent any data packages to the B.One Gallery or B.One Middleware. In this case, either trigger the transmission manually or just wait a little longer and try again later. In this context, it should also be noted that only those position values are transmitted to the B.One Gallery for which there is or was a GNS / GPS Fix.
After clicking on “Add Notification” a new entry will appear in the list of your notifications and a simple geofencing is set up. Another tip: If you would like to receive several notifications for different distances, this is also possible. To do this, simply add more notifications for the additional distances.
A small digression on notifications: When you create a notification in the B.One Gallery, you currently have the option of being notified by email or SMS. For the free email notifications you only have to enter the email address of the recipient, for the paid notifications via SMS you first need an account with the third-party provider 46elks with a corresponding minimum credit.
Do you have any questions or comments on this topic? Do you already use the Tabs Object Locator and if so, which use cases do you implement with it? I look forward to your comments and a mutual exchange!
– 📖🕓 ≈ 10min – You have purchased access to the B.One Gallery visualization tool, but are now wondering where exactly you can find what? Our Quick Guide – B.One Gallery provides the answer to this question and gives an overview of the areas and functions of the tool.
– 📖🕓 ≈ 9min – Last modified on 11th April, 2024 As recently announced, I would like to use the example of two LoRaWAN® sensors and the B.One Gallery visualization…
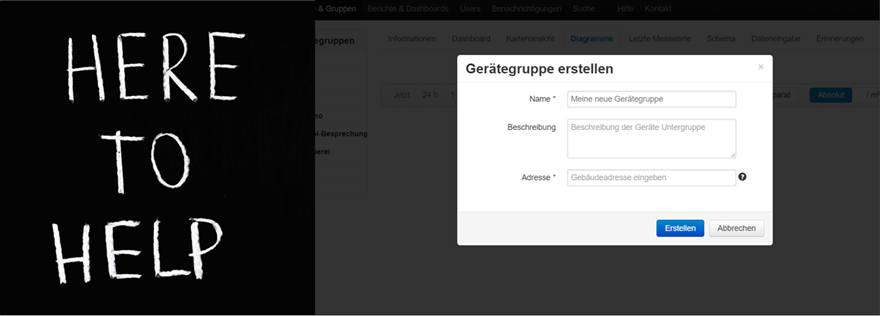
– 📖🕓 ≈ 7min – Are you wondering what device groups are in the B.One Gallery, what are they good for and how can you create and manage them? You can find the answers in this post.
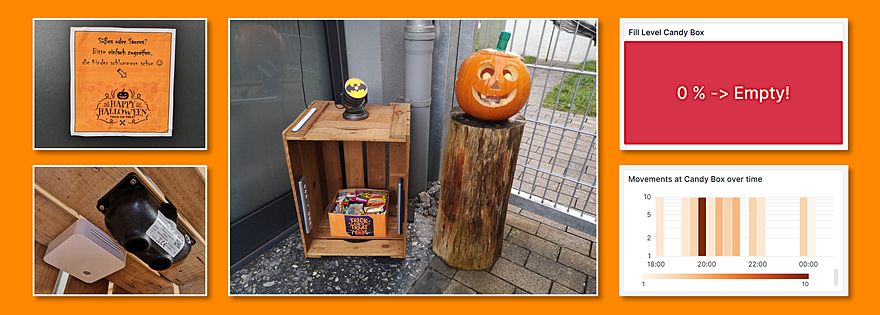
– 📖🕓 ≈ 8min – Recently it was time for “trick or treat” again on Halloween. This year with LoRaWAN® house entrance monitoring. Find out more about the implementation, the results and other lessons learned.
In order to provide you with the best possible user experience and offer, we use cookies on our website that are not only technically necessary but also serve to analyse access. By clicking on 'Accept all' you agree to this. You can find more detailed information and how to revoke your consent at any time in our Privacy Policy. (Decline)
Our website uses cookies to help us improve our website and provide you with the best possible service. These cookies are necessary and cannot be disabled. We also use cookies to analyse the traffic on our website. By clicking on 'Accept', you agree to our cookie policy:


Responses