B.One Community Howto: Create and manage your own Communities
Updated on 04/08/2022
Regional and topic-specific Communities (= Groups) offer you as members of the B.One Community a place to network and exchange ideas with other like-minded people. Either because of the physical proximity to each other or because of a common interest in certain subject areas or industries in which IoT and/or LoRaWAN® are used. In the article “Your start in the B.One Community – areas & functions at a glance” we showed you where you can find the existing communities, how they are structured and how you can join a private or public community as a member. In the following we will go into more detail and deal in particular with the following questions:
- How can you create a new community, what settings can you make for it and how do you invite new members?
- What user roles are there within a community and how do they differ?
How can you create a new Community?
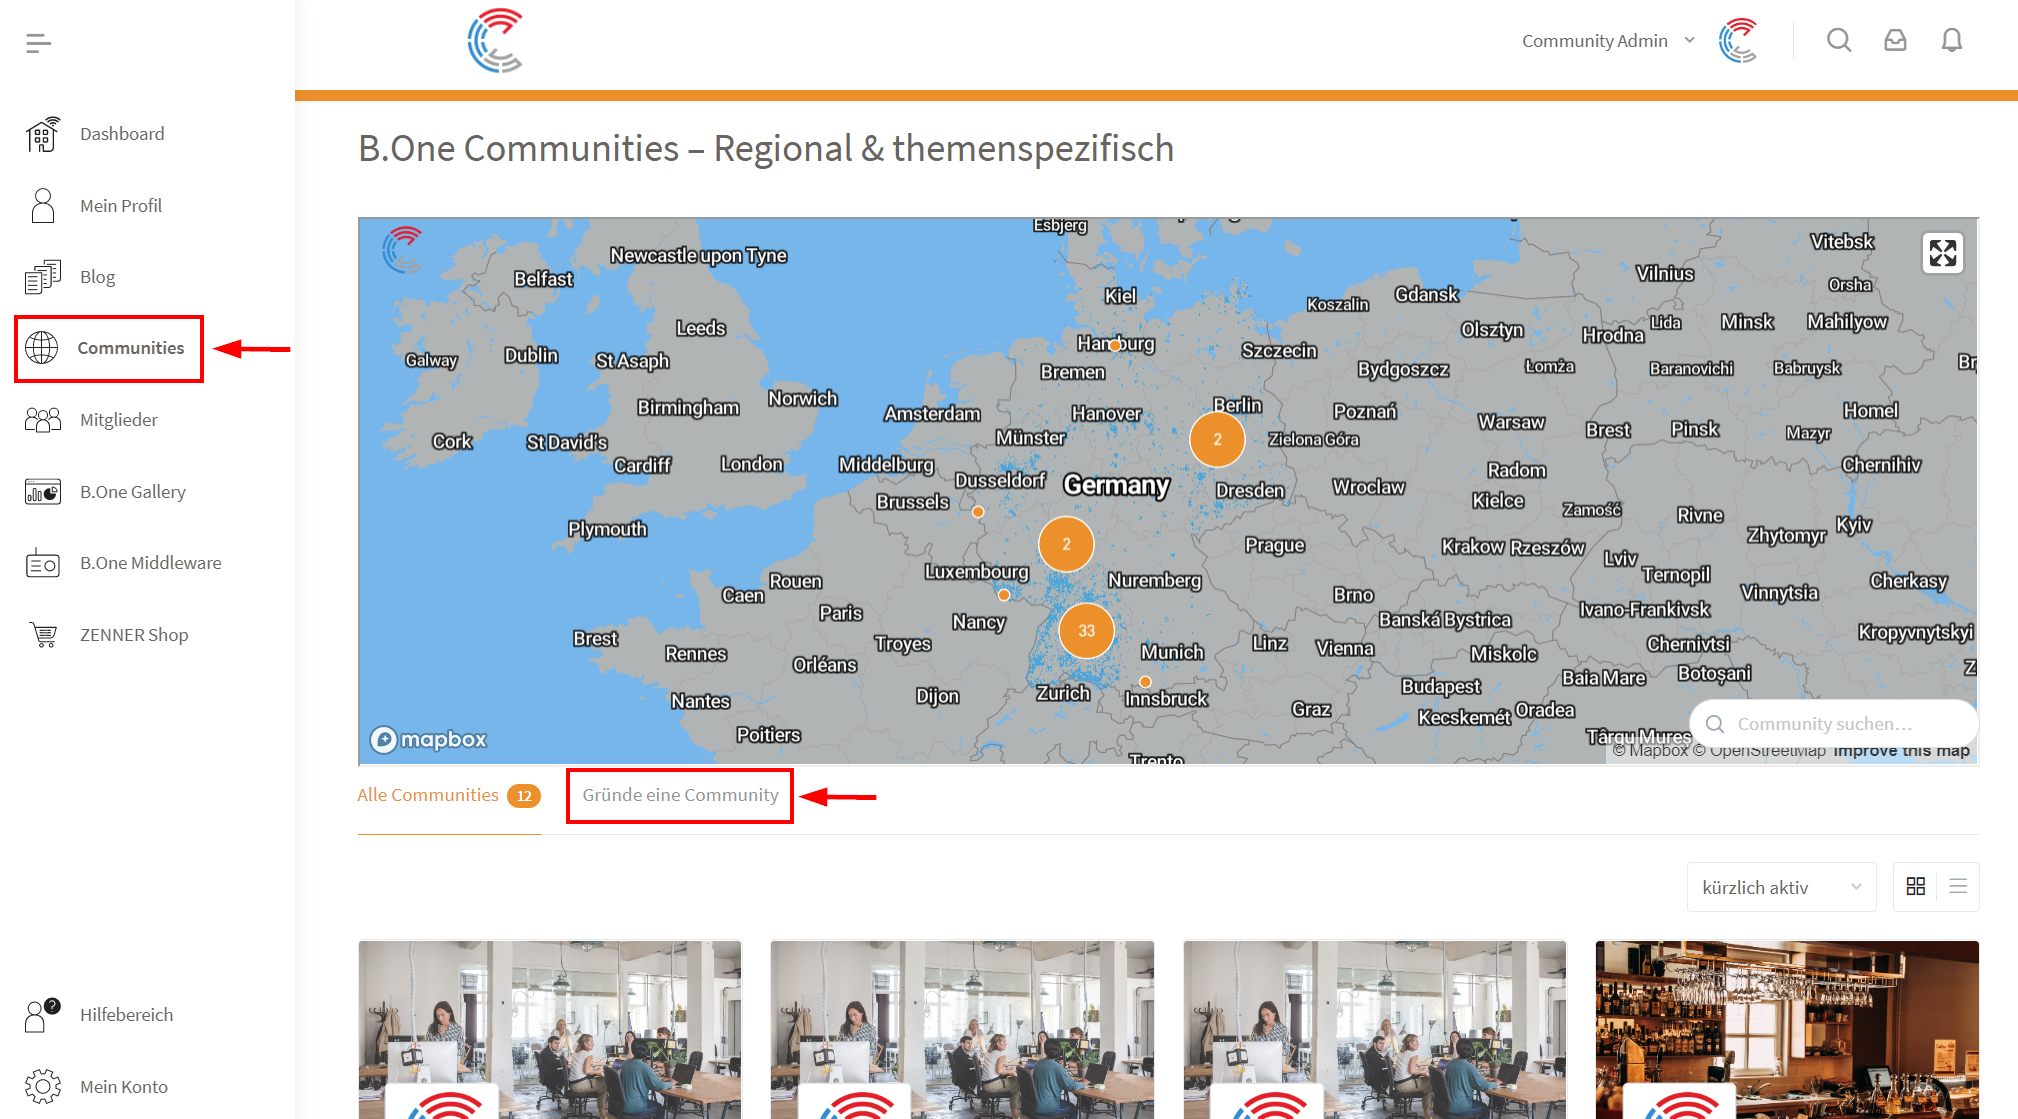
If you don’t find an existing community that matches your interests, you can easily create a new one. To do this, click on the “Create a Community” tab in the ”Communities” area and a corresponding input mask including an overview bar of the steps to be followed will appear.
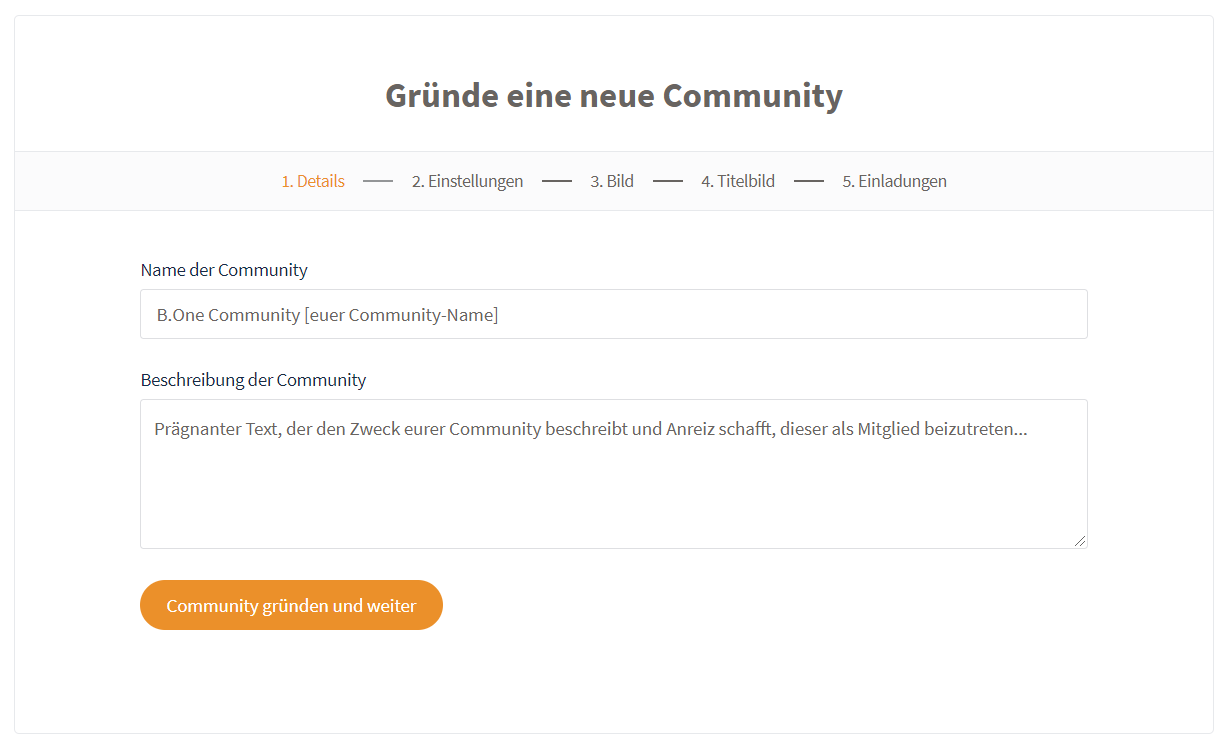
1. Details
In the first step, you enter the basic details of your community, more precisely name and description (optional). The description helps to inform others what the purpose of your community is and of course to create an incentive to join.
2. Settings
Next you choose the settings that should apply to your community.
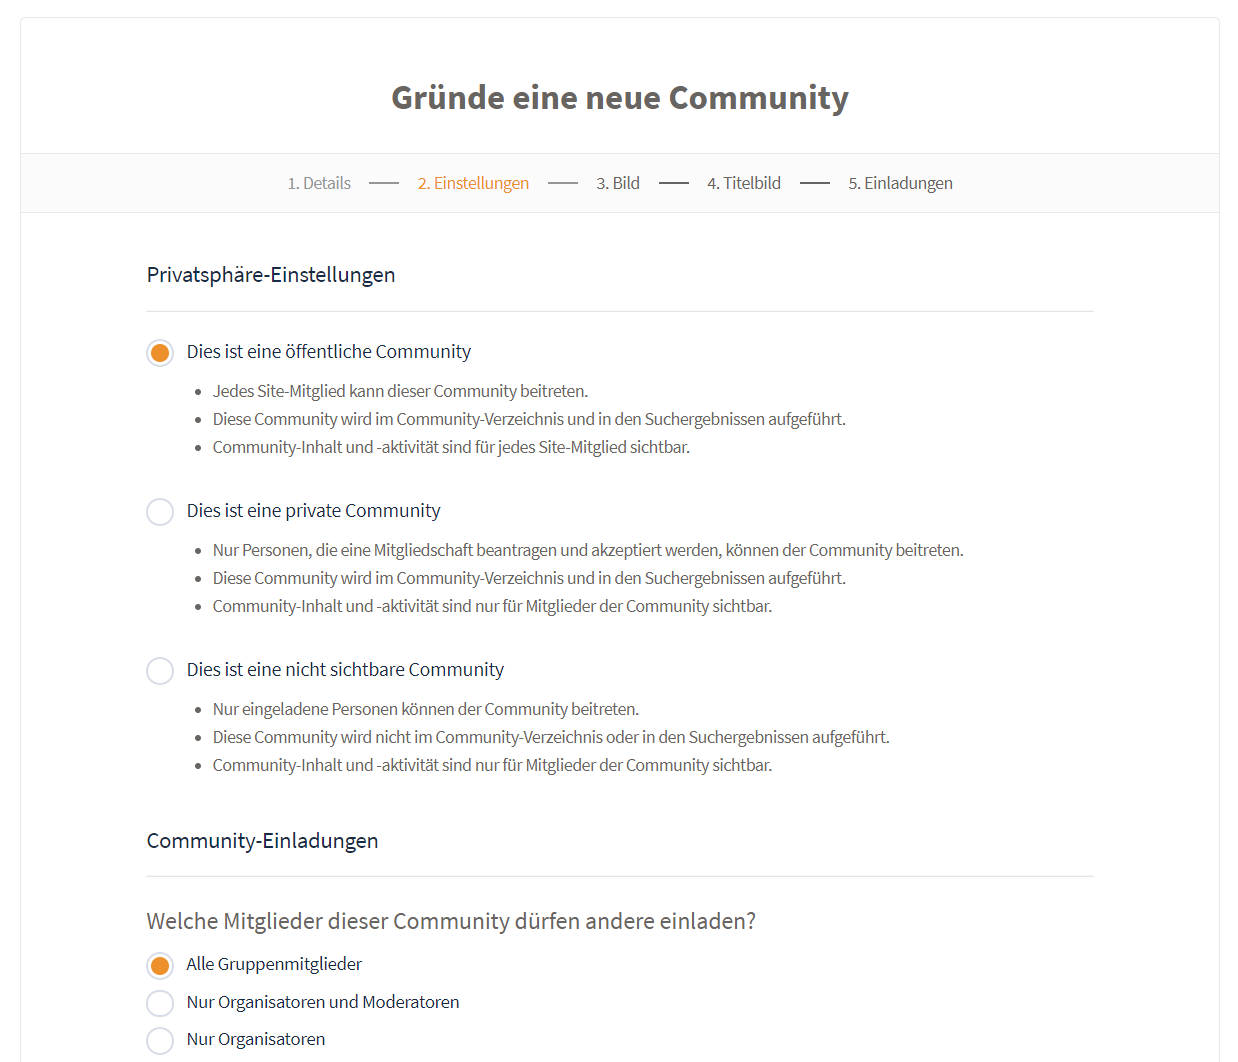
Privacy Settings
You use the privacy settings to determine whether it should be a public, private or invisible community . Here is a brief explanation of the difference:
- Public (default setting) = Anyone can see the content and join as a member
- Private = Membership must be requested and approved by an “Organizer”, content is only visible to verified members
- Not visible = Community cannot be seen by other users/members in the “Communities” area or in the search results
With a non-visible community, however, you should always bear in mind that potential new members can only become aware of it through explicit invitations.
Community Invitations
Under the item “Community Invitations” you define who may invite new members to your community. You can choose from all members (default setting), only organizers and moderators (the moderator role is currently not active) or only organizers.
Activity Feeds
Under “Activity Feeds” you set who in your community is allowed to post news/updates in the activity feed. So whether everyone (default setting), only organizers and moderators or only organizers.
Community Photos & Albums
Here you can set whether all members (default setting), only organizers and moderators or only organizers can manage uploaded images and albums in your community.
Group Messages
Furthermore, analogous to the settings above, you can configure which members of your community are allowed to send group messages. The default setting in this case is “Organizers and Moderators only”. Group messages allow you to send a collective message to the members of a community without having to message each one individually. We will go into detail about this function in a separate post.
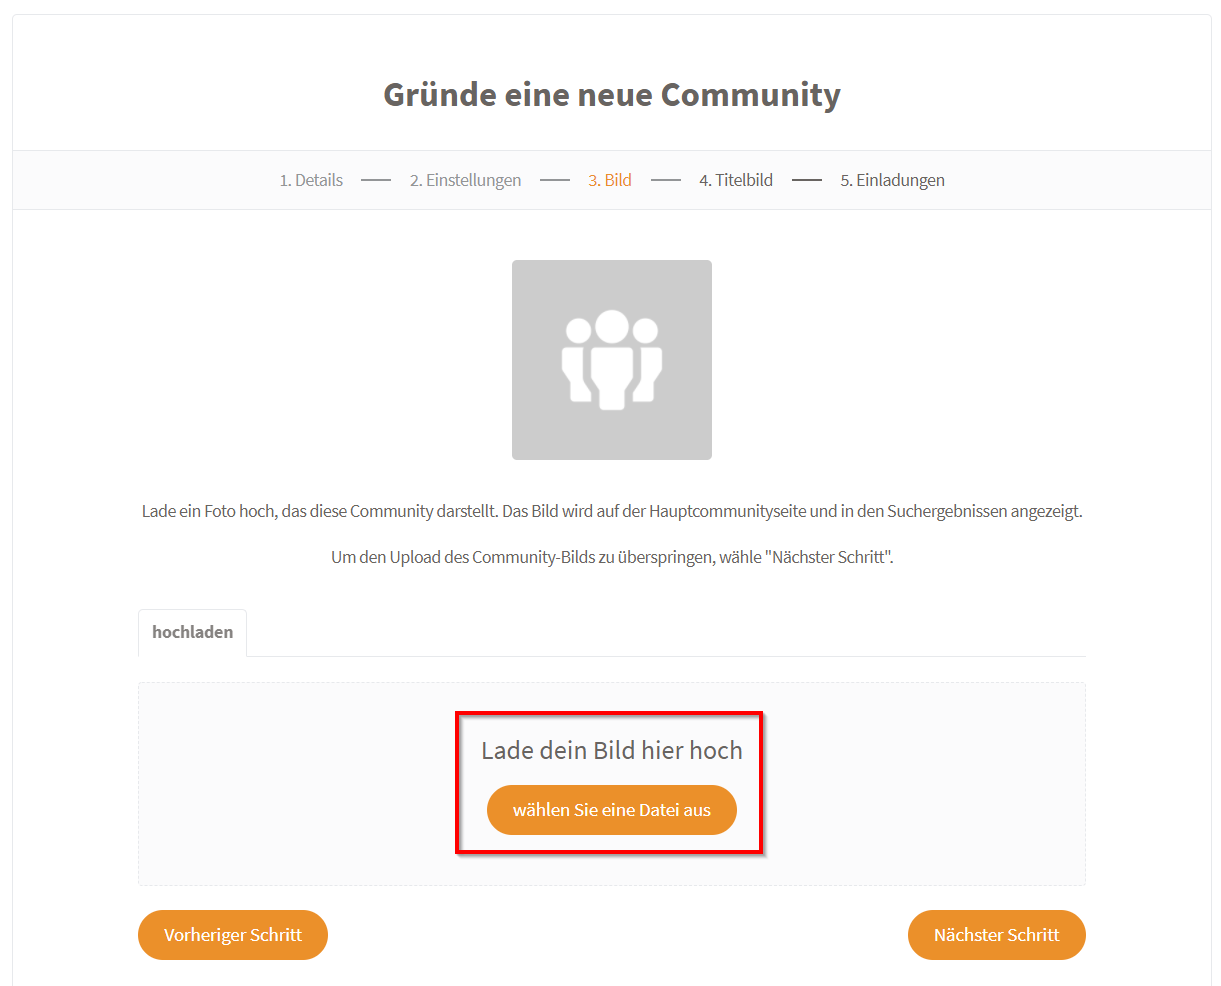
3. Photo (optional)
In the third step you can then upload a profile photo for your community, which will be displayed in the header of your community, in the overview of all communities and also in the search results. Tip: For an optimal display, it is best to use a square format, even if you can still crop your uploaded photo.
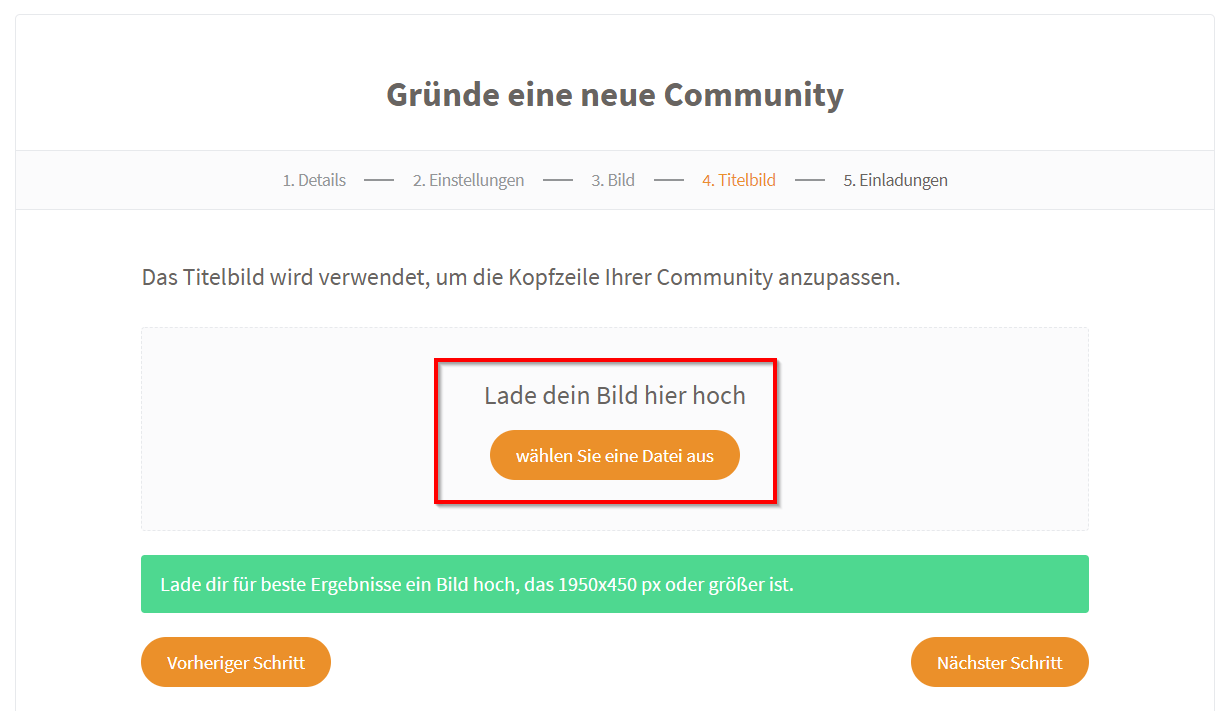
4. Cover Photo (optional)
In addition to the profile picture, you can also upload a cover photo in the fourth step. This is usually not displayed in the header of your community like the profile picture (here you can currently always see a map with the gateway positions of members of your community), but in the overview of the communities (see screenshot below). If you don’t store your own cover image, the general community image will simply be used, which can also be found at the top of the homepage. Tip: For best results, use a 1950×450 px photo or larger.
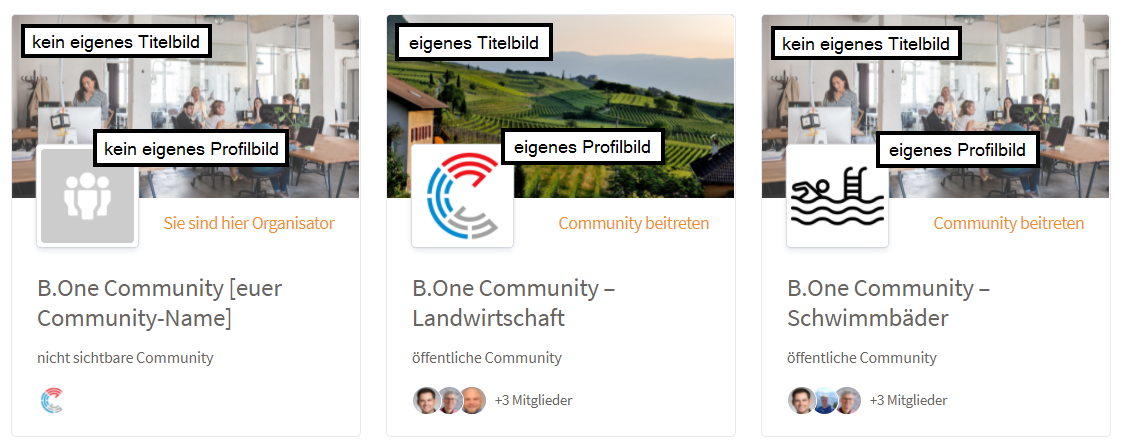
Below is an example: on the left a community without its own profile and cover photo, in the middle a community with its own profile and cover photo, on the right with its own profile photo but without its own cover photo.
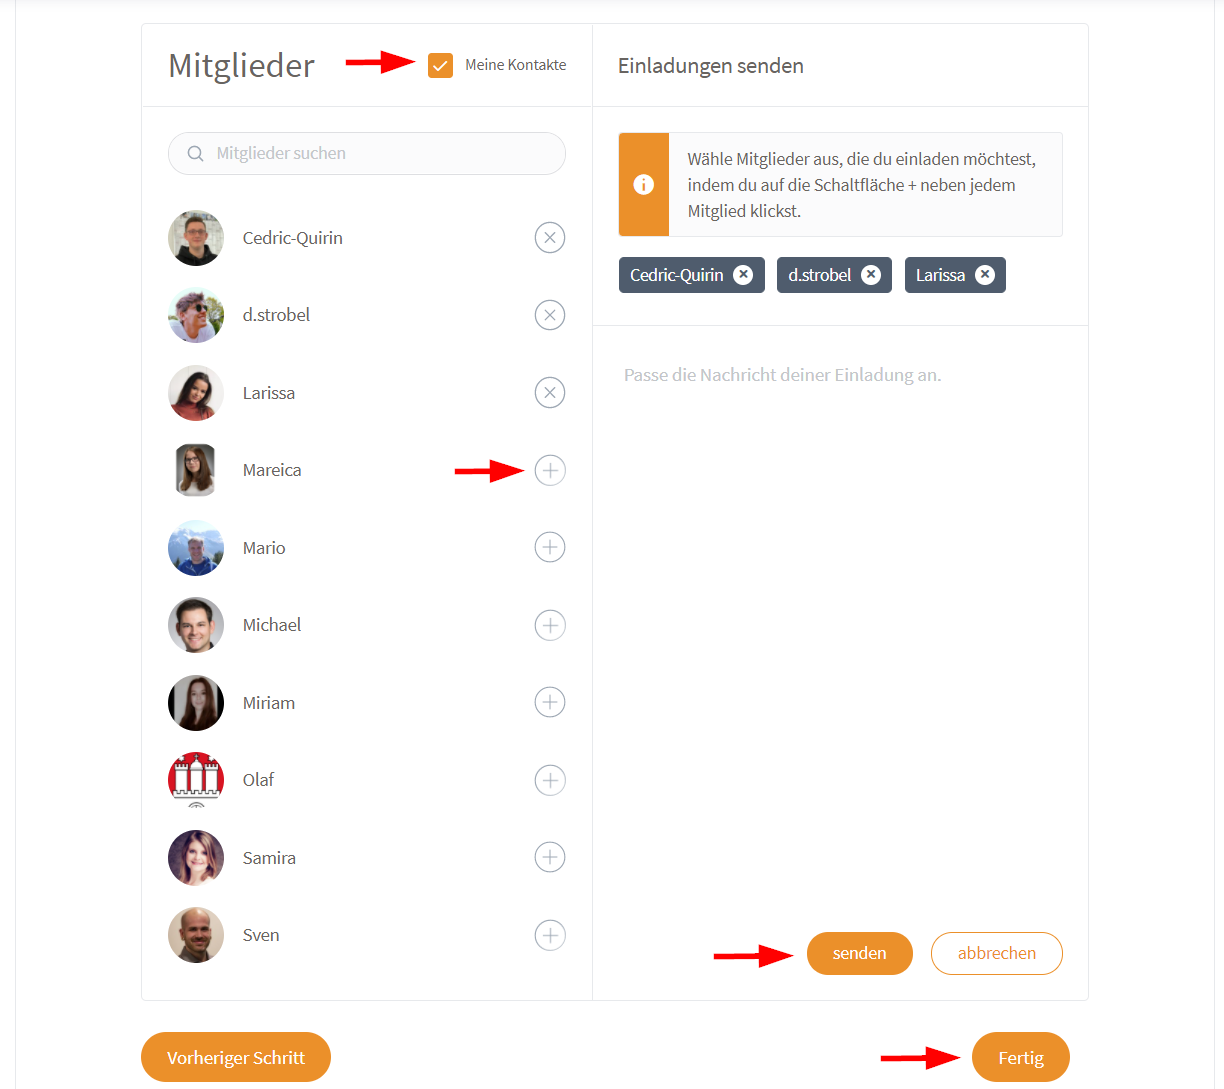
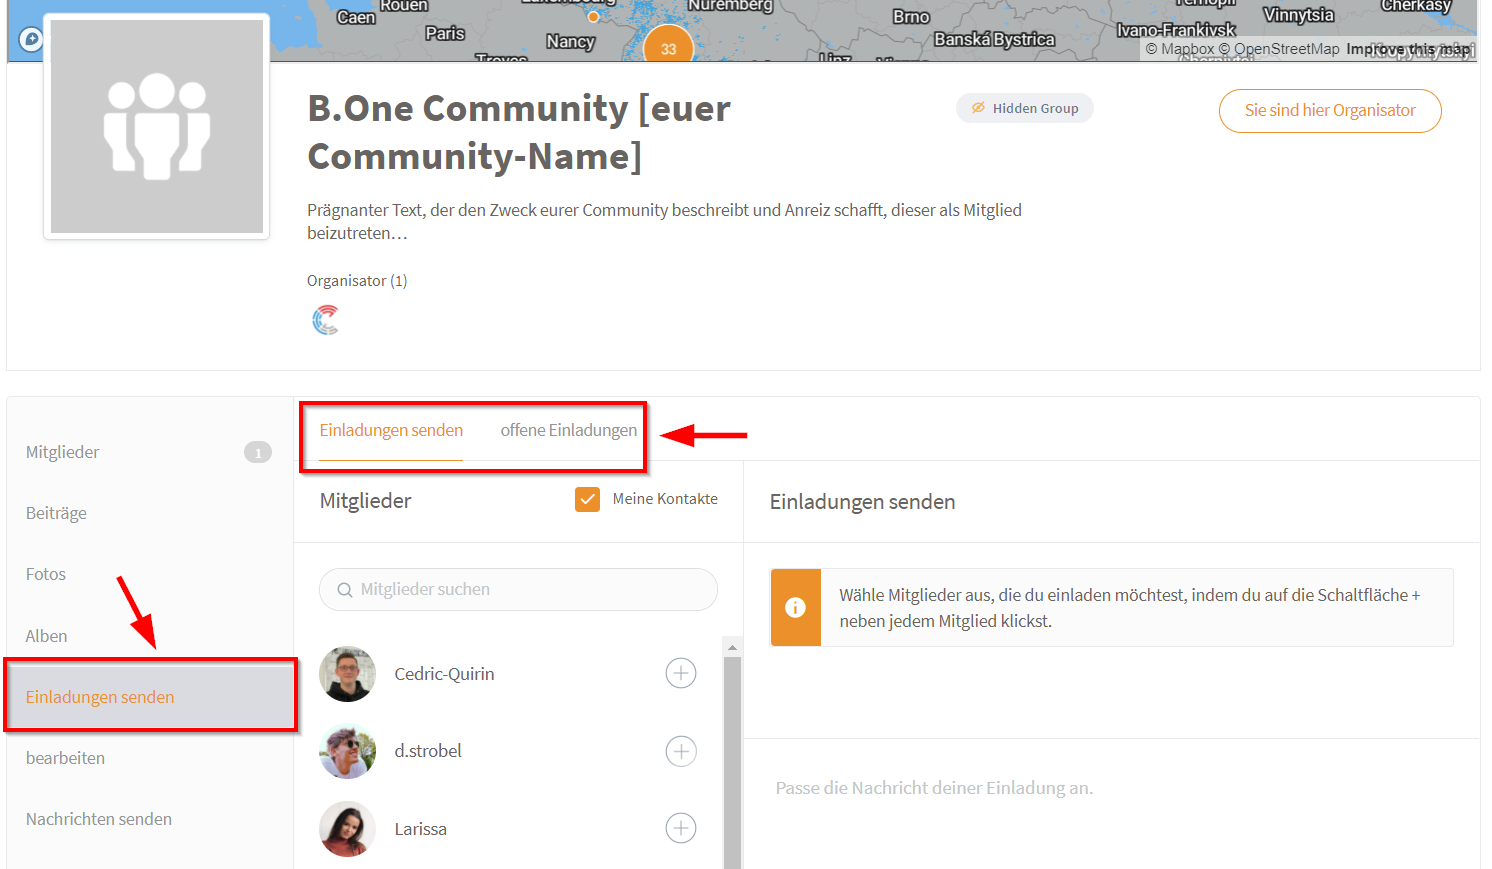
5. Invites
In the fifth and final step, you can invite new members to your community directly. To do this, simply add the desired members to the list on the left using the respective plus icon, add a personal message if required and go to “Send”. A little tip: In order to find certain members in the list more quickly, we recommend the practical search and/or the “My Connections” filter.
After clicking on “Finish” you will land on the initial standard view of your just created community.
Important: if you leave the mask for creating a new community without going through all the steps in full, for example by closing your browser window, your community will still be created and will already appear in the overview. If you want to prevent this, simply set your new community to “not visible” while editing and then back to “public” or “private” as soon as you’re done.
Can new Members be added later?
Of course, you can also invite new members at any time after the creation of your community. To do this, simply go to “Send Invites” on the left in your community and you will be taken back to the member selection described above.
Can Settings also be changed later?
Of course, this is also possible at any time. Go to “Manage” on the left and you can adjust your previously selected settings.
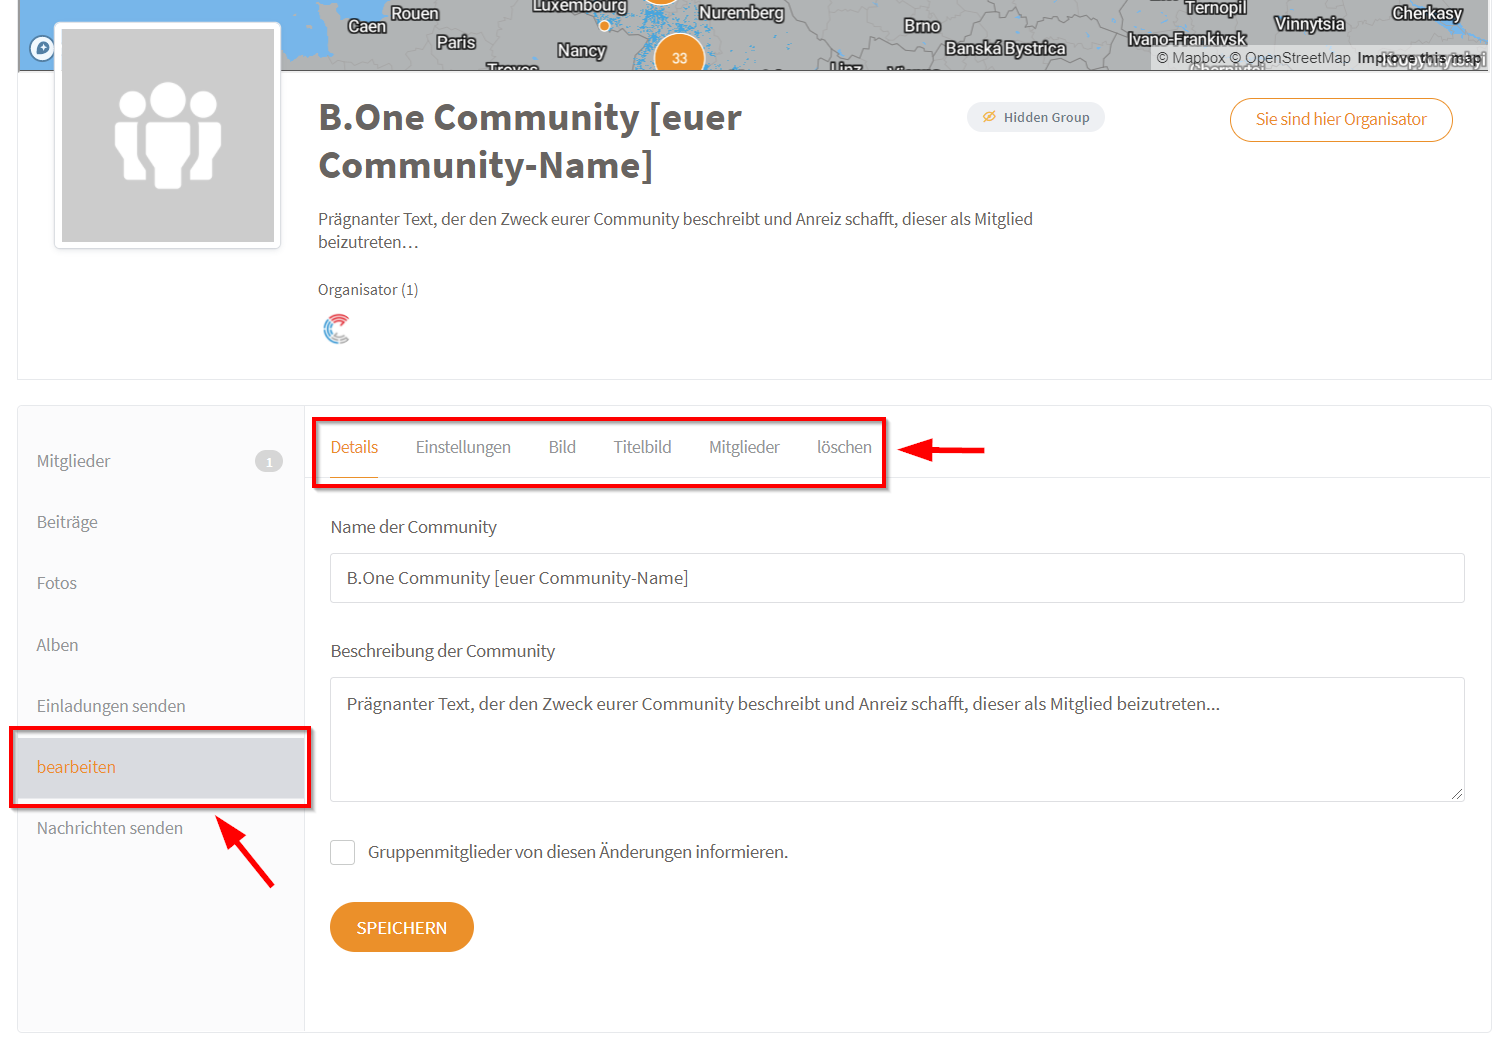
You also have the option of deleting your community here. But be careful: Deleting will completely delete all associated content in the B.One Community and cannot be restored. So be 100% sure before deleting a community.
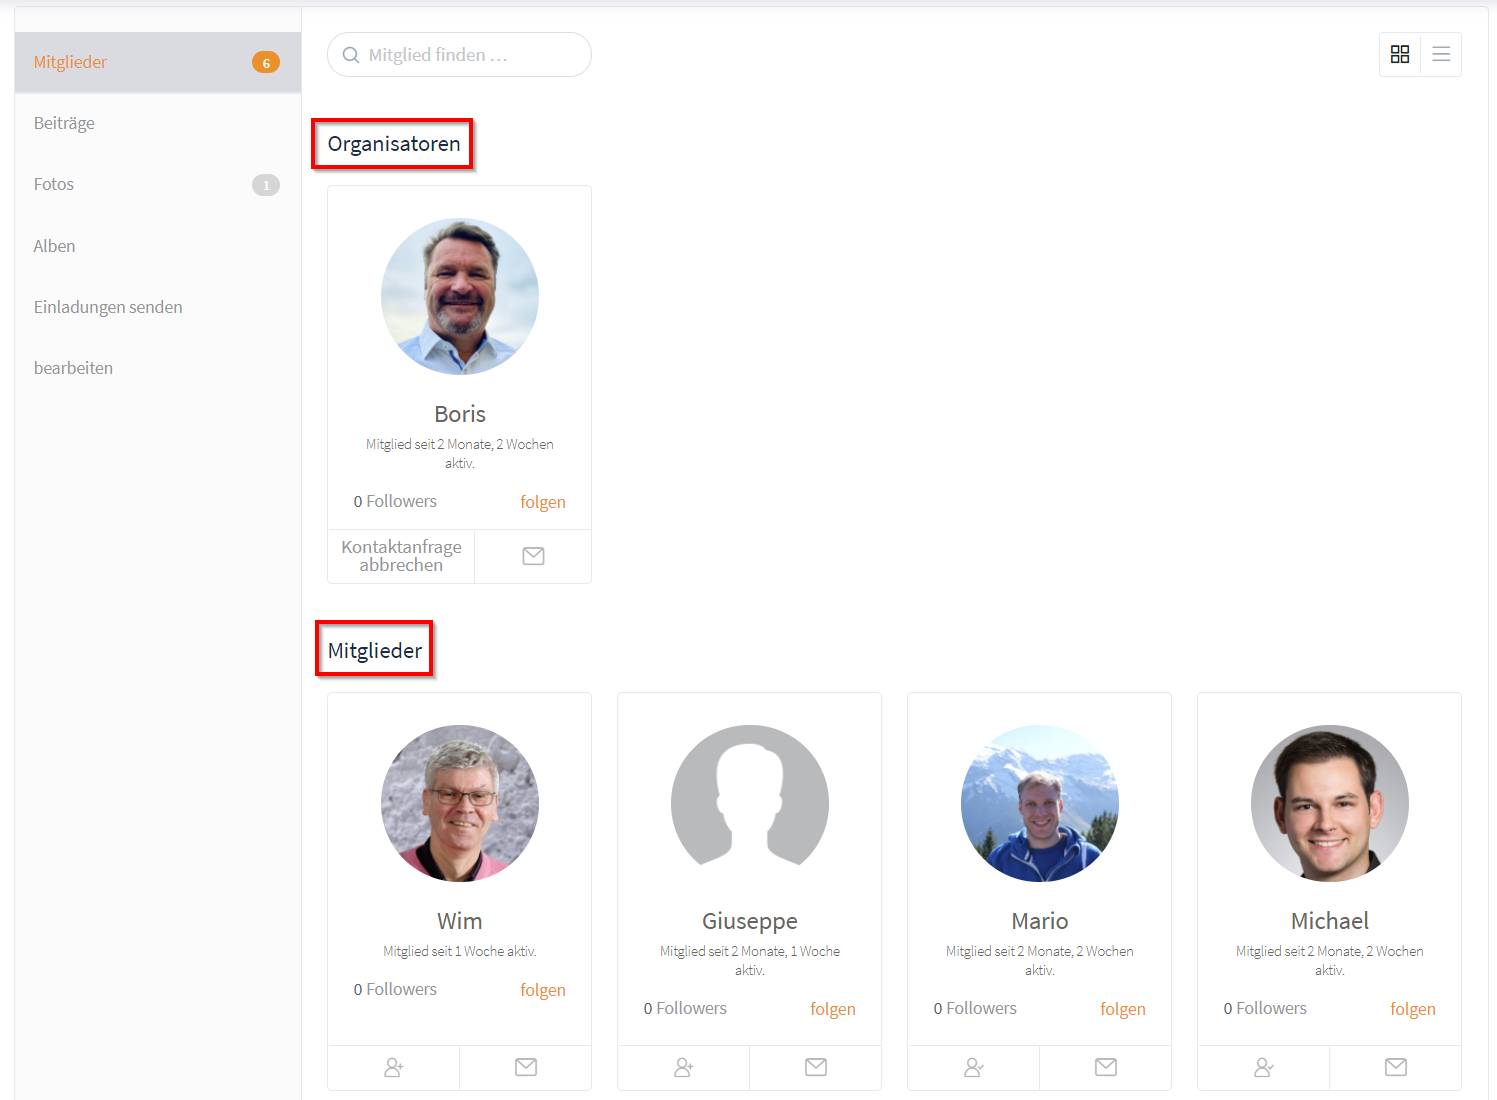
What User Roles are there and how do they differ?
As has already been made clear above, the members of a regional or topic-specific community can have different user roles. A distinction is made between “normal” members (default role for new members) and “ organizers ”.
Members can:
- view content and the community members
- contribute to discussions and make posts in a community’s activity feed
Organizers have full control over a community’s content and settings, in addition to being able to:
- change the details of a community (name and description)
- change the settings of a community including status (public, private or not visible)
- change a community’s photos (profile photo and cover photo)
- manage the members of a community including changing the roles
- delete a community
You now know in detail how you can set up your own (regional or topic-related) community, which setting options are available to you, which user roles and how these differ.
Do you have any questions or suggestions? Then leave us a comment or write to us via the Contact form 🙂


Responses